Adding and Managing a Blog
Use our built-in blogging capability to create and edit posts right on your site.
Note: The maximum page count of a Without Code site is 1000 pages, and blog posts are not included in the overall page count. You can have a maximum of 1500 blog posts per site.
To add a blog, click the Blog option in the left menu and select “Add Blog.”

When you add a blog, you will be directed to the the Manage Posts menu, where you will find 3 demo posts. The demo posts help to understand your post layout, how to access and edit posts, and to add placeholder posts to the All Posts widget. Feel free to delete the demo posts if you like.

Within the Manage Blog menu you will find the following options:
- + New Post
- Manage Posts
- Blog Settings
- Edit Layout
- Import Posts

Creating a New Blog Post
To create a new blog post simply follow these steps.
-
Start a New Post
Click the orange button to begin creating a new blog post. You’ll be asked to:
• Enter a Title
• Assign a Post Author
• Choose a Featured Image to represent the post
•Select a Post Layout (see the section on layouts further down in this guide for more details)
Note: See the Adding and Managing Post Authors section below for details on adding and managing authors.
- Begin Editing
- Once your setup is complete, click the orange Start button. This will open the blog editor, where you can:
• Add your Title and Subtitle
• Write and format your Content
• Insert Images or Media
- Save or Publish
- When you’ve finished editing, make sure to click “Save” to keep your draft, or “Publish” to make your post live.


Adding and Managing Post Authors
You can assign a post author by typing their name directly into the post author field when creating a post. However, this method does not save the author to the list, so you’ll need to re-enter the name in other blog posts.
The CMS Users associated with your site will also appear as authors in the "Post author" dropdown. You may select from any CMS User that also has Blog permissions enabled. To add or remove CMS Users, go to the "Manage CMS Users" option in the dashboard menu. See the CMS User Accounts doc for additional details.

If you want more control over your blog authors and how they appear on your site, as well as a consistent list of authors, you can use the Blog Signature widget. This widget lets you add a styled author section to your posts, including a photo, bio, contact information, and social links, all in a clean, professional layout. See our Blog Signature widget documentation here for more information.

Publishing and Scheduling Posts
- Create a new blog post.
- When you’ve completed the blog post, you may click the Publish button to publish the post immediately.
- If you would like to schedule the publishing of the post, click the Done button in the top menu. This will save the blog post draft.
- In the Manage Posts section of the blog, click the gear icon.
- Click the Schedule Post link.
- Select a date.
- Click Save. Your blog post will be published on the day and time you selected.

Manage Posts
The Manage Posts area is the main area for accessing and editing all of your blog posts. Use this option to open and update existing posts, access post settings like metadata, duplicate posts, or delete posts.

Republishing Posts
You can republish individual blog posts or select multiple posts to bulk-republish.
- Open the Manage Posts tab.
- Using the checkboxes on the left-hand side of the blog posts, select the posts you wish to publish.
- Click the orange Publish button on the top right of the window.

Unpublishing Posts
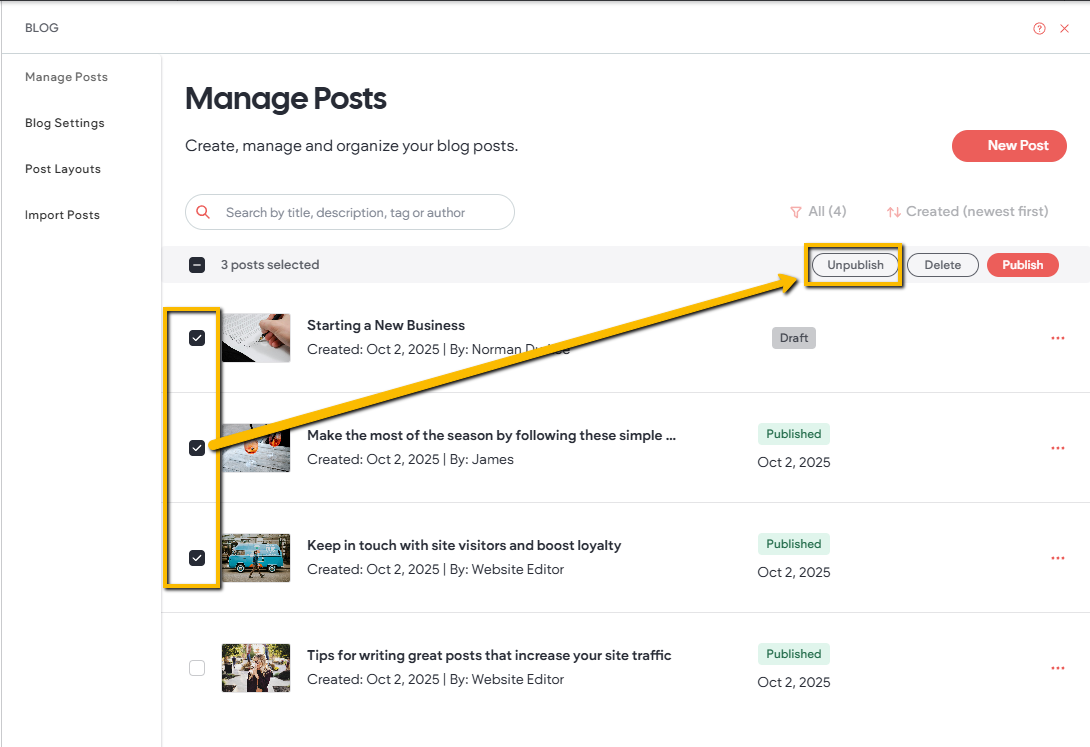
You can unpublish individual blog posts or select multiple posts to bulk-unpublish.
- Open the Manage Posts tab.
- Using the checkboxes on the left-hand side of the blog posts, select the posts you wish to unpublish.
-
Click the Unpublish button on the top right of the window.

Deleting Posts
You can delete individual blog posts or select multiple posts to bulk-delete.
- Open the Manage Posts tab.
- Using the checkboxes on the left-hand side of the blog posts, select the posts you wish to delete.
- Click the Delete button on the top right of the window.

Sorting And Filtering Posts
You can sort blog post chronologically as well as filter visible posts based on their published state using the filter and sorting buttons on the top right of the manage post window.

Blog Settings
Use Blog Settings to access your blog name, description, thumbnail, RSS feed information and more. Keep in mind that these settings apply to your entire blog (all posts). Settings for individual posts can be accessed through the Manage Posts page.
Consider using the meta title option. Meta titles help search engines understand what a specific web page is all about and can improve SEO by making it easier for people to find your posts.

Post Layouts
Post layouts let you control the design of your blog posts and choose the structure that best fits your content. Editor 2.0 allows you to create and store multiple layouts. The Classic Editor uses the same layout for all posts.
-
Editing an Existing Layout
Hover over the layout you want to modify and click the orange Edit button. To see how it looks before editing, select Preview.

-
Browsing Layout Options
Click Browse Post Layouts to view a library of predefined designs. You can apply these directly or customize them further to match your site’s style and branding.

Applying a Layout
- When creating a new post, select a layout using the Post Layout dropdown on the Create New Post screen.
- To update the layout for an existing post, open the post’s Settings, then use the Post Layout dropdown to select a new design.

Deleting & Duplicating Layouts
When viewing your post layouts, each layout includes additional options that can be accessed through the three-dot ellipsis menu in the top-right corner of the layout card. This menu provides the following actions:
- Rename: Change the name of a layout to improve organization and clarity.
- Duplicate: Create a copy of an existing blog layout. This allows you to modify the design without affecting any blog posts that use the original layout.
- Delete: Permanently remove a blog layout from your account.

Editing Post Layouts
When you design or update a layout, any blog post assigned to it will automatically use that layout’s design. This ensures consistent formatting across posts and saves time—you don’t need to create a new layout for every post.
Widgets can be added to the layout, just as you would on any other page. We’ll take a look at a few key widgets that are included in the default blog layout below.

The All Posts widget is a great widget to place on your blog layout (it will be in the layout by default). It shows every post on your blog and encourages site visitors to explore other posts. Using the content and design tabs you can alter the layout and elements of this widget.

The Search Posts widget allows visitors to search for relevant articles. Using the content and design tabs you can define the field text, as well as the style and spacing.

Import Posts
You can import existing blog posts from an RSS feed. This will import all posts, including text, images, videos, author names, publish dates, and Disqus comments, however, elements that are not supported will not import.
Once you have imported, these posts will remain in draft until you publish.

Note: if your RSS feed isn’t importing properly, there may be issues with the link or the format. First, ensure the URL is correct, then check the file to ensure that the feeds use content tags, as opposed to description tags. Another common issue is that the feed doesn’t give access to the next page; this will prevent Without Code from pulling in all posts.

Post Schema
Schema is a structured data language that is used to pass important information about your site to search engines. When schema is used in blog posts, search engines can display rich results that contain additional information about blog posts, instead of a simple link to your site or blog post.
Good news! Schema markup is generated automatically for every newly published blog post (this feature was added on June 28, 2023). For optimal SEO, ensure that all of the information is filled out completely in the blog post settings.

Blog Tags
You can use tags to categorize blogs posts, making it easier for visitors to find relevant content. Within the Manage Posts option, find the relevant post and select “Post Settings.”

Scroll down to “Post Tags,” enter the relevant tag and + Add new tag.
Every tag you enter will be saved. When entering tags on future posts, saved tag names will autofill, revealing a list of previously used tags in a dropdown menu. This allows you to select previously used tags, which creates consistency.

Once you have added tags, you can filter posts based on tags. In the Edit Layout area, click to open the content tab and select the tags from “Filter by tag.”

Linking To Blog Posts
If you would like to link directly to a specific blog post from anywhere else on the site, you can do this by clicking the Blog post option when using any widget that offers a button or link.

If you'd like to link to a certain section of a blog post, you can use anchors. Anchors in the blog work just like anchors in the regular site editor, and are especially useful for longer blog posts, tutorials, or guides where you want to link to a particular section.
